
Deal:
In this window, you record the procedures agreed with the patient, the cost of each procedure, the tax/discount applied to the procedures, and the patient's financial disclosure information .
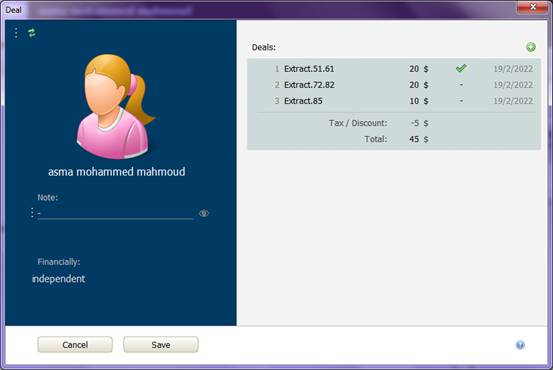
The right section displays agreements :
Add a new agreement:
Click
the icon
![]() or the + button on the keyboard.
or the + button on the keyboard.
From the procedure menu, select the appropriate procedure, select the teeth to which the procedure is applied.
Click OK.
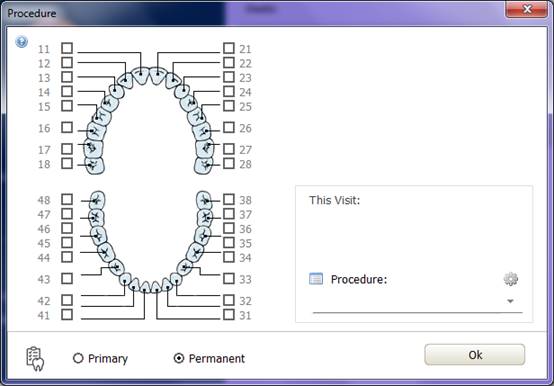
When you click OK, the Action window will disappear, and the Money window will appear.
From the money window, the cost of the procedure will be calculated according to the prices that you entered in the All Procedures window
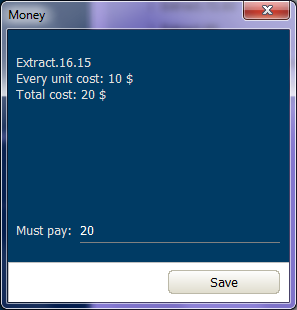
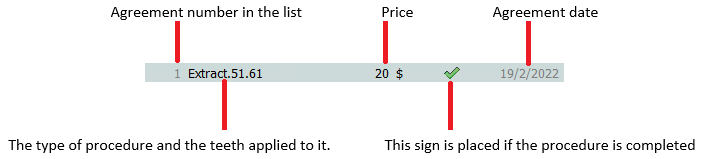
At the top of the window are written actions and their price.
At the bottom of the window is the amount that the patient must pay for these procedures.
In the text box at the bottom there is a built-in calculator, type the required calculation, press the = key, the program will calculate the result, for example: Treating 10 teeth, each tooth has an amount of 45, with a discount of 20, type: 45 * 10 - 20
Press = , you will find the result is 430
Click OK, the agreement will be added to the list.
The new agreement is added to the date of the current day.
Delete an action, modify the details:
Right click on the action name, a menu appears .
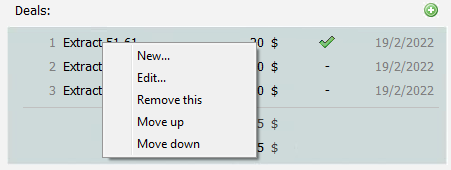
In this menu:
• New…
Add a new agreement.
• Edit…
Amending the name of the agreement and the teeth covered by it.
• Remove this
Delete the agreement that was clicked.
• Move up
Modify the order of agreements by moving the selected agreement up.
• Move down
Modify the order of agreements by moving the selected agreement down.
To change the value of the agreement:
Click the amount, Money window will appear, type the new value and click OK.
To change the date of the agreement:
Click on the date of the agreement to be modified, the date window will appear, choose the new date and click OK.
To
set an agreement as expired, click
![]() A flag
A flag
![]() will appear next to the agreement, this flag will
appear next to the agreement in the patient information window.
will appear next to the agreement, this flag will
appear next to the agreement in the patient information window.
When you put an finish sign next to all agreements, an finish sign will appear next to the patient's name in the "All patients" window.
Discount/tax:
You can record the amount of the total discount provided to the patient, or the amount of the added tax.
Click on the value of the discount/tax, or on the heading "Discount/Tax":
![]()
The Discount/Tax window will appear:
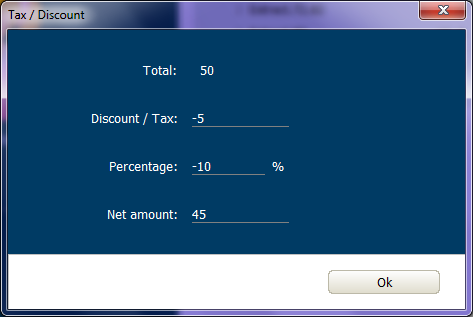
It appears:
• Total amount before deduction/tax
• Discount/Tax:
The value of the discount is negative, the value of the tax is positive.
• Percentage of discount or tax
• Net amount . after applying the discount/tax
Notes:

You can write any text you want as a note regarding the agreement in general.
The
icon
![]() means that
your note will appear in the "patient info" window at the bottom of
the agreement section.
means that
your note will appear in the "patient info" window at the bottom of
the agreement section.
When
you click on the previous icon, it will change to the icon
![]() , which
means that this note will not be visible in the patient information window.
, which
means that this note will not be visible in the patient information window.
Click
the icon
![]() to open the Note Edit window so you can easily type longer text.
to open the Note Edit window so you can easily type longer text.
Patient's financial disclosure:
Either the patient is independent, i.e. pays for himself.
Either the patient is a payer, meaning he pays for himself and for others, for example the father pays for himself and his children.
Or it is related to another, meaning that someone else pays for it, for example the sick child is linked to his father’s account.
By default, the patient will be independent:

To change the patient's position:
Click
on
![]() , the
window will appear:
, the
window will appear:
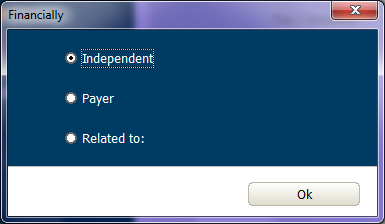
Select the new position of the patient.
When you click on "Related to", a window for selecting payer will appear.
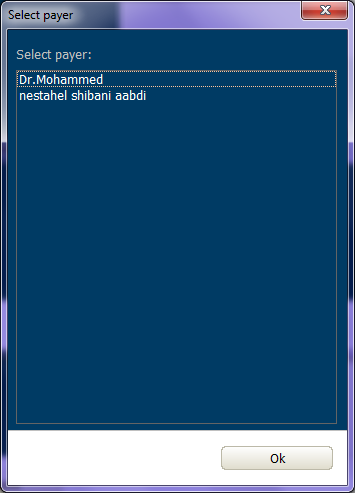
Select the payment entity to which the patient is related and click OK.
How do you add a new payer?
Payers are divided into two types:
• Patient
• Independent Payer
Patient:
One of the patients pays for the other, like the father pays for his children.
Independent Payer:
An external payment entity that is not among the patients, for example, a company that a doctor contracts with to treat its employees, and the company undertakes the payment.
You can see the payers by clicking on the section marked in red in the patient information window (for any patient).
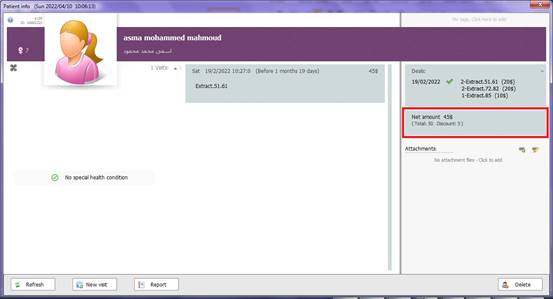
If a payment entity is removed from the list, all patients associated with the deleted payment entity will appear to be associated with an unknown payment entity.
More information:
Click
on
![]() in the
corner of the window. "more information" window will appear.
in the
corner of the window. "more information" window will appear.
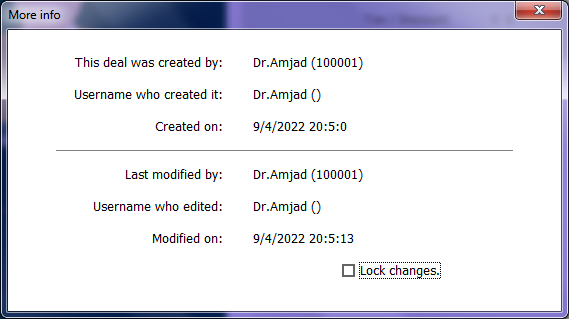
When you select Modify Lock, only the user who created the Agreement will be able to modify the Agreement.
You will only be able to lock the modification if you are the user who created the agreement.